Adding herbs and spices to dishes not only gives a dish its signature flavor (think curry for Indian food, cumin and chile powder for Latin dishes), but also in many cases the flavors are in fact antioxidants. Why are antioxidants important? In short, they slow down the aging process caused by oxidative stress in our cells. Just as the antioxidant Vitamin C in lemon juice can stop an apple from turning brown, antioxidants in food have a similar effect in the human body.
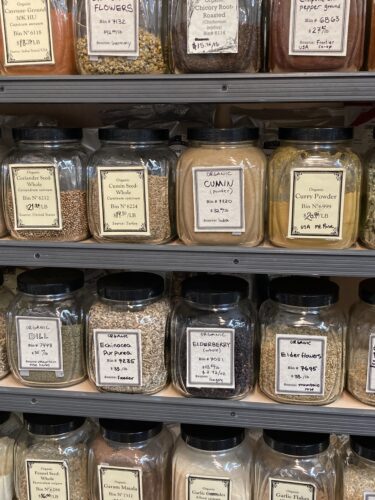
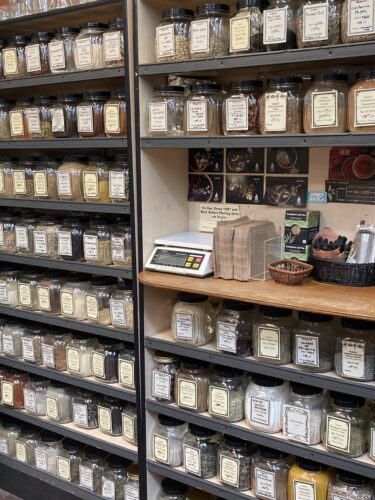
Which herbs and spices pack the biggest antioxidant punch?
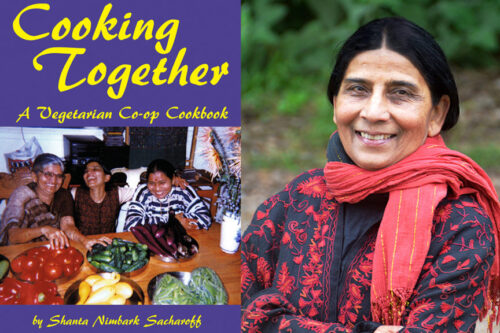
Oregano & Marjoram: try adding them to pasta sauce
Lemon Balm: makes a great tea
Peppermint:
Beverages: make tea or add to lemonade or water
Food: add to salads, chutneys, soups, spring rolls, even chocolate desserts!
Allspice, Cinnamon, & Cloves: add to oatmeal or a baked sweet potato, or drink some chai tea
And we can’t talk about the power of spices without mentioning turmeric, a plant whose yellow pigment curcumin can benefit a huge array of conditions. To name but a few here: lung and brain disease, cancers, arthritis, lupus, and inflammatory bowel disease – it even has been shown to speed recovery after surgery! Dr. Michael Greger, author of How Not to Die, suggests that 1/4 teaspoon of dried turmeric (or ¼ inch of fresh turmeric) per day is sufficient, if combined with some black pepper to help the body absorb curcumin.
Turmeric (with black pepper): easy to add to smoothies or use in curries
Another healthful powerhouse is cayenne pepper, which has numerous benefits in addition to turning up the heat in a recipe. Repeated ingestion of cayenne (actually capsaicin, the burning component of peppers) can help alleviate many painful ailments such as headaches, irritable bowel syndrome, and indigestion.
Cayenne pepper: add to chilis, tacos, fajita veggies
Speaking of pain, ginger was found to work just as well as a best-selling migraine medicine, and also beat out Dramamine in an anti-nausea test! Ginger is also great for menstrual cramps and PMS – ⅛ teaspoon of powdered ginger worked just as well as 400 mg of ibuprofen; no wonder ginger is known in India as “the great medicine.”
Ginger: great added to stir-fry or smoothies
Some other spices with benefits include fenugreek, which aids in improving muscle strength and weight-lifting power, and cilantro helps reduce inflammation and can counteract gout.
Fenugreek: use in curry recipes
Cilantro: add to salads or top off your favorite Asian or Latin recipe
This short-list only represents a tiny sample of the variety of organic fresh and dried herbs and spices available at Other Avenues, not to mention the many cookbooks we have to provide inspiration in the kitchen. E-mail us a photo of your favorite “spicy” recipe and we might post it on OA’s social media!
-Maureen, OA worker/Plant-based Nutrition Enthusiast
New Year’s Resolution: EAT MORE VEGETABLES! With a Warming Recipe For the New Year
By Shanta Nimbark Sacharoff
Many New Year’s resolutions revolve around modifying behaviors, especially changing eating habits. During the holidays, we are surrounded by unhealthy foods, bombarded with their ads and end up indulging. Once the holidays are behind us, many people resolve to cut down on sweets and other empty calories. But how about a positive spin on changing food habits by addition something good in our diet–such as eating more fresh vegetables and fruits? And if you already consume a lot of fresh produce, share some with friends and family members. Sharing is caring!
You might say what is the need? Don’t we eat enough vegetables and fruits? And why it is so important to eat a lot of vegetables and fruits?
Here are the answers: the latest national nutritional surveys show that over 80% of Americans do not eat enough fruits and 90% of us do not eat enough vegetables. We are eating less vegetables and fruits now than ever before. This is why the government’s guidelines as outlined in “Choose my Plate” recommend that half of our daily food consumption consist of vegetables, fruits, and whole grains. They no longer emphasize the now outdated Nutrition Pyramid where the meat group or its protein alternatives were on top (“meat” is not listed as a group in my plate). You can view these recommendations at https://www.myplate.gov/.
Protein, which literally means “of importance,”, builds and maintains our body’s tissues. However, nutritional surveys indicate that most Americans consume more protein than their bodies require which can convert into fat. Furthermore, the surveys show that it is the micronutrition requirements that many Americans are not meeting. Your body needs the micronutrients such as vitamins and minerals from your daily diet in addition to protein and carbohydrates to maintain bodily functions. Specifically, micronutrients help us with digestion and prevention of chronic illnesses. Foods that are rich in micronutrients are vegetables and fruits. This is why we need to eat a lot of fresh vegetables and fruits.
Vegetarians generally consume more vegetables than their omnivore counterparts, but I know vegetarians who do not eat vegetables! Not nearly enough! Some of them load up their plates with carbohydrates and cheese. A nutritionally balanced menu should include fresh fruits and vegetables, whole grains and some protein-rich foods. And, don’t forget, vegetables contain protein too!
In California, we are blessed with fresh vegetables and fruits year around. So why do some Californians not eat enough vegetables? Here are a few reasons: First of all, even in California, there are places that do not have markets that carry fresh produce. And many of us eat our meals out-of-home where fresh vegetables and fruits may not be included. Our kids grow up eating their meals in school cafeteria where fresh vegetables may not be served. Plus, there is the deep-rooted prejudice some of us have built against vegetables that were poorly cooked and force-fed to us in our childhood. So, let us break the prejudgment and resolve to make some changes. How do we do that? Here are some practical tips and suggestions along with a warming recipe that will help you to include more fresh vegetables and fruits in your diet and/or help others to do that.
A few basic tips that can help you to plan a vegetable and fruit- centered diet:
Start your weekend (or a day off) by shopping for fresh produce at a nearby market, at a supermarket or from a farmer’s market. I start my Sunday by shopping at the Outer Sunset Farmers market for fresh produce and add other food items, more fruits and vegetables from my favorite shop, Other Avenues Food Co-op on Judah and 44th avenue.
Reduce meat and other costly items to budget for more fresh produce. Always include some leafy greens–some of them being raw to be eaten as salads. In addition to adding valuable micronutrients, raw greens provide fibers which are helpful in our digestion.
Use fresh fruits as a snack and serve them as a dessert.
Plan a few meals for the week and make a shopping list for vegetables and fruits. Select some simple dishes, such as a quick soups, salads and small plates for the working days.
When planning menus, try to complement elements such as texture, consistency, and temperature of the dishes. For example, a pasta entrée goes well with a saucy soup and a substantial slice of a vegetable quiche pairs well with a light salad. Cold nights might start with a hot bowl of brothy soup, followed by a small plate or a casserole and a salad.
Be creative! Combine your favorite easy dishes with something new you have just learned how to make. Combine various ethnic components to create a refreshing menu. For example, you might serve a rice/quinoa pilaf with a ratatouille.
A few kitchen gadgets such as two good knives and a food processor (and/or blender) are very helpful for preparing vegetable dishes.
Work ahead of time when you can. Some preparation can be done ahead of time to better manage the day of serving. For example, a salad dressing can be made for the week in advance. Other tasks, such as chopping vegetables for a soup can happen hours ahead.
It has been said that we eat with our eyes. Take time to arrange fresh colorful ingredients to please the eyes. You will simultaneously tempt your taste buds and increase your level of satisfaction with the food you eat.
For an elaborate dish such as a lasagna for the weekend, involve other family members or roommates. Each step (such as grating cheese and making the sauce) can be done ahead of time, by different persons. Kids can cook too. Get them involved in the kitchen at early age. Cooking together and sharing the meal with your loved ones is always joyful!
Vegetable Soup with White Kidney Beans and Red Chard
This hearty soup can be made with a variety of vegetables and leafy greens. The consistency can vary from being a substantial stew-like one pot meal or a hydrating entré with a lot of broth. Either way, it is delicious. For a thick soup, start with a little less water and add some cubed potatoes. For a more brothy soup, start with more water. Fresh herbs give this soup an elegant touch.
½ to ¾ cup dried cannellini beans, or 1½ cups canned cannellini beans
Water as needed for boiling dried beans
2 – 3 tablespoons of olive oil
1 stalk of leek, or a few stalks of scallion, chopped with some green portion, about 1 cup
2 cloves of garlic, minced
½ red bell pepper (about ½ cup) cut into very small pieces
1 carrot finely diced, approximately 1 cup of diced carrots
2 or 3 stalks of celery, finely diced, about 1 cup when diced
1 zucchini or yellow summer squash cut into cubes, about 1 cup
1 large or two medium sized chopped tomatoes OR canned tomatoes, 1½ cups
2 tablespoons fresh parsley minced
½ teaspoon each fresh thyme and oregano, minced (or ½ dried Italian herbs)
½ bunch red chard (2 cups), cut into ribbons after trimming (keep inner red veins and some stalks)
Approximately 4 to 5 cups water
1 medium potato, peeled and cubed to measure about a cup, (*optional—for a thicker soup)
1 to 1½ cup of water to crush some of the beans
Salt and freshly grated black pepper to taste
½ cup red wine or vinegar
1 teaspoon sugar or honey to balance the tartness of wine or vinegar
Finely grated Parmesan cheese for topping (optional)
If using dried beans, boil them in 4 cups of water for 45 minutes or until very soft. Cannellini beans take less time to cook than many dry beans. (You can speed up this step by first soaking them in warm water for 1 to 2 hours). Drain and set the cooked beans aside. If using canned beans, do not boil them. Drain the canned beans, discarding its liquid and set them aside.
Heat the oil in a pot and stir-fry the leek for 2 minutes. Add the garlic and bell pepper and continue to fry them for a minute. Add the carrots, celery and summer squash. Sautee the mixture for a few minutes. Next, add the tomatoes, parsley and herbs and stir-fry for five minutes until tomatoes soften. Add the chard. Then add water and bring the mixture to a boil. (Also, now add the optional potatoes for a thicker soup.) Reduce the heat. Let the soup simmer while preparing the next step.
Using an electric blender or a food processor, puree half of the beans with 1 or 1½ cup of water and leave the other half intact. Add pureed and unpureed beans to the simmering soup. Add salt and pepper to taste. Add the red wine or vinegar to the soup. Taste to adjust the seasonings. Add the optional sweetener if you need to balance the flavors. Cook the soup for 10 minutes, until the vegetables and beans are soft and integrated. Pass a bowl of grated cheese (optional) for topping. Serve with croutons or bread rolls or pasta.
Shanta is a Sunset District resident and the author of “Cooking Together” and “Flavors of India,” both available at Other Avenues Food Co-op, Green Apple Book Store, Rainbow Grocery Co-op, and at other local bookstores. Shanta writes recipes and articles on food and teaches cooking classes. She shares recipes on her YouTube channel.
WATERMELON FRUIT SALAD BASKET — Play with your Food!
by Shanta Nimbark Sacharoff
Remember when your mom or grandma said, “Don’t play with your food, just eat it!” Well, in this column, you will learn how to have fun playing with your food and then eat it too! This is a fun-filled food activity for the whole family, kids included. I will show you how to make a watermelonbasket and then how to use it to serve up a fruit salad. Depending on their age, kids will need an adult’s help for this activity because you will use a sharp knife to carve the melon.
INGREDIENTS
A small watermelon
Few seasonal fruits such as plums, nectarines and peaches –about 6 to 8 fruits
A handful of strawberries or raspberries
A lime or a lemon
TOOLS
A wide-blade sharp knife
A small knife
Two bowls
A couple of large spoons
A cutting board
A non-toxic marker (you can find this in the toddler section of any art supply store)
PREPARATION
Select a melon that feels firm and fresh. Buy some colorful fruits and berries to make the fruit salad. Add a lime or lemon to squeeze on top. This keeps the fruits fresh. Keep the fruits in refrigerator until you are ready to make the fruit salad basket.
Cut all fruits—except for the melon—into bite-size pieces and place them in a mixing bowl. Squeeze the lemon or lime juice on top and set the salad aside.
Next, place the watermelon onto the cutting board where it can sit comfortably. Cut off a sliver from the bottom of the melon to make it more stable.
Then, using a non-toxic marker, draw some lines to guide you where you will carve the melon. As shown in illustration #1, starting from the top center, draw two parallel lines, about 1½” away from each other, to reach half way across the melon. These lines show where the handle of the basket will be. Next, draw a line around the circumference of the melon, starting from bottom of the handle line and going to the other end of the same line. (Be careful not to cut into the handle.) These lines willguide you where to insert the knife to carve the melon to remove the first wedges out. (See illustration #1.)
Next, using a sharp knife, dig into the melon, following these lines to loosen the flesh of the melon. Then, remove the big wedge of the melon that should come out easily. Set the wedge on the cutting board. Repeat the same action on the other side of the handle shape and take out the second wedge. Set it on the board.Now, you can see the handle of the basket (illustration # 2). Remove the skin off both wedges and cut them into bite-size pieces.
Then, scoop out some flesh from under the handle, being careful not to break the handle or the wall of the melon. Place the chunks on the cutting board along with the other hunks. Cut the melon chunks into smaller, bite-size pieces and add to the mixing bowl of fruit salad.
Now, fill up the melon basket with as much mixed fruit as you can. The rest of the mixed fruits can be refrigerated for second rounds of filling the basket. Now, you can take this prettybasket (illustration #3)to a picnic or place it on your dinner table. But wait, DO NOT carry the basket with its handle. The handle is not strong enough to be carry the fruit salad. Place the basket onto a platter or a bowl to carry it to its destination. Refrigeratethe melon basket and mixed fruits until ready to serve.
Shanta writes recipes and articles on food and nutrition. Shanta was a co-worker/owner of Other Avenues for over three decades and she retired from the co-op two years ago. Shanta is the author of two cookbooks: “Cooking Together,” “Flavors of India” and a food co-op history book, “Other Avenues Are Possible: Legacy of the Peoples’ Food System of the San Francisco Bay Area”. Shanta’s books are available in San Francisco at Other Avenues Food Co-op, Rainbow Grocery Co-op, Green Apple Books, Folio Books, Omnivore Books, Book Passage and in Sausalito at Driver’s Market. You can order her books from googlebooks.com, greenapplebooks.com, instacart.com/rainbow-grocery.
Currently, Shanta is creating cooking demonstration videos from her backyard to share them with the public via YouTube.
Most curries are yellow, brown or green, but this is a uniquely bright red curry! The recipe is my modified version of a traditional South Indian curry, while using seasonal and local ingredients.
Red is the color for February. It symbolizes heart, love and friendship, so we give flowers and candies to our loved ones. But the American Heart Association has a different theme. February is AHA’s Heart Awareness Month to remind us that heart disease is one of the major causes of premature deaths in the USA. They point out that many factors contribute to heart health, such as family history of heart illnesses and diet. While genetic factors are out of our control, we can make food choices for our heart health. The AHA recommends including fresh vegetables in our daily menu, so let’s celebrate February by having healthy meals!
The beets, potatoes and carrots in this curry are packed with nutrients that help regulate blood flow, maintain an ideal blood pressure and lower bad cholesterol level. Coconut milk and coconut oil are also considered healthy cooking mediums.
INGREDIENTS
1 small bunch of beets (or 3 small to medium size beets, equaling about 2-2½ cups chunks)
1 cup chopped beet leaves or spinach, stems removed
1 large or 2 small potatoes ( about 1 to 1½ cups when cubed)
1 carrot, cleaned and cut into rounds (approximately 1 cup)
2 tablespoons of coconut oil
1 small red onion, chopped finely
Half of a red bell pepper, cut into small pieces after removing seeds
2 cloves of garlic, minced 1 tablespoon grated fresh ginger root ½ teaspoon ground cardamom, cinnamon and cayenne pepper (OR less for a milder curry) 1 teaspoon salt ½ cup beet broth reserved from boiling beet roots 1 cup coconut milk (canned or fresh) Juice of half a lime or lemon A few tablespoon chopped cilantro leaves
PREPARATION
First, peel the beets and potatoes and cut them into chunks. Boil 3-4 quarts of water in a large pot and cook the beets for 45 minutes. Then remove a cup of beet broth from the pot and set aside. (Later the broth will be mixed with coconut milk to make the sauce). Add potatoes to the pot and boil them with the beets for 15 minutes. Add the carrots and boil all the roots together for 10 minutes. Drain the liquid and set the boiled roots aside.
Next, heat the oil in a skillet and sauté the onion, pepper, ginger and garlic until the onion starts to wilt. Then add the boiled roots and beet greens (or spinach) and stir fry them for a few minutes. Add the powdered spices and salt and stir fry for 5 minutes. Then, combine the beet broth with coconut milk and pour over the cooking vegetables. Cover the pot and simmer the curry on moderate heat for 15 minutes. Then check for doneness by pressing a piece of beet between your fingers: if it is soft, then the curry is done. Adjust spices and sprinkle on some of the lime juice.
To serve the curry, place a cup of rice in a large serving bowl and make a well in the center. Pour the curry in the middle and sprinkle the remaining lime/lemon juice all over. Garnish with cilantro leaves on top.
Shanta writes recipes and articles on food and nutrition. Shanta was a co-worker/owner of Other Avenues for over three decades and she retired from the co-op two years ago. Shanta is the author of two cookbooks: “Cooking Together,” “Flavors of India” and a food co-op history book, “Other Avenues Are Possible: Legacy of the Peoples’ Food System of the San Francisco Bay Area”. Shanta’s books are available in San Francisco at Other Avenues Food Co-op, Rainbow Grocery Co-op, Green Apple Books, Folio Books, Omnivore Books, Book Passage and in Sausalito at Driver’s Market. You can order her books from googlebooks.com, greenapplebooks.com, instacart.com/rainbow-grocery.
Currently, Shanta is creating cooking demonstration videos from her backyard to share them with the public via YouTube.
Shanta’s Butternut Squash and Brussels Sprouts Curry
By Shanta Nimbark Sacharoff
Butternut squash and brussels sprouts are in abundance in the fall and winter when our bodies need them. They both contain nutrients needed for the cold season. Butternut squash is rich in important vitamins A, Bs, and C, minerals, plus disease-fighting antioxidants. This low-calorie, fiber-rich winter squash can protect us against conditions such as cancer, heart disease, and mental decline. Brussels sprouts are high in fiber; vitamins A, K, and C; and minerals. These nutrients can reduce inflammation, protect bone health, support digestion, and improve blood sugar levels.
Using both of these super vegetables, I created a festive dish for the holidays. This recipe was inspired by my sister visiting from India who created a dish when she saw the cute brussels sprouts for the first time. My version is a fusion of her Indian techniques with some Thai ingredients, adding a thick spiced sauce made of butternut squash and coconut milk.
This recipe requires several steps, but the creation is very rewarding. (The various steps can be done ahead of time and assembled in the last step right before serving). The process includes steaming or baking the squash to separate its flesh, and cutting it into chunks; making a sauce with coconut milk; boiling some potato cubes; skillet-frying tofu and brussels sprouts; assembling all ingredients with herbs and finally covering them with the sauce. This is a substantial, colorful, and delicious vegan center piece for your holidays.
INGREDIENTS
1 medium-sized butternut squash (you will need 3 cups when cut into chunks after cooking)
1 Yukon gold or red potato, peeled and cut into small chunks (to measure 1 cup)
4 tablespoons oil
1 cup firm tofu, cut into small cubes
12 to 16 brussels sprouts, stubs trimmed and halved (to measure 1 cup when cut into halves)
1 cup coconut milk (not cream; low-fat coconut milk is okay)
1 teaspoon each cumin, turmeric, and coriander powders
1/2 teaspoon cayenne powder
1 teaspoon salt
1 stalk of lemongrass, cut into 2-inch pieces (optional)
3 to 4 tablespoons finely chopped scallion or spring onion with some of their greens
2 cloves of garlic minced
1 tablespoon grated ginger root
Few strips of red bell pepper
1 tablespoon chopped cilantro with its stems
1 teaspoon freshly squeezed lemon or lime juice
Chopped cilantro for garnish
Rice or roti, to serve
PREPARATION
Cook the squash by baking or by steaming. I prefer steaming because it is faster and more easily controlled for doneness. Steamed squash is easier to peel than either raw or baked squash. To steam the squash, place the halves with the cut-side down on a steamer basket. Put 2 cups of water in a saucepan that is large enough to fit the basket. Cover and steam for 15 minutes. Then uncover, insert a fork in the flesh; if it comes out easily, the squash is done, it should not be too mushy.
Alternatively, to bake the squash, preheat the oven at 350 degrees and bake the squash for 45 minutes. To check doneness, insert a fork and if it comes out easily it is done. You do not want to over-bake the squash as it will cook more in later steps.
In a separate small pot filled with 3 cups water, parboil the potato cubes for 10 minutes or less until they are cooked but still firm. Drain and set the potato cubes aside.
While the squash and potatoes are cooking, spread 1 tablespoon oil on a skillet and heat it over a medium flame. Lay the tofu cubes in a single layer and fry them on one side for several minutes till they change color. Turn to cook the second side until lightly browned. Remove the tofu and set aside.
Next, add 1 tablespoon oil on the same skillet and lay the brussels sprouts halves in a single layer with the cut-up side down. Cook for several minutes till they start changing color. Turn to cook the second side for 2 minutes. Set the sprouts aside.
Next, check the squash. Allow the cooked squash to cool and then peel it. Cut the squash into bite-sized pieces and set aside 1 cup of chunks. Place the rest of the squash (2 cups) into a jar of a blender or food processor. Add the coconut milk, 1/4 cup water, powder spices, and salt. Blend into a sauce. Place the sauce into a pot and cook it gently for 5 minutes over a low flame. Add the lemongrass to the sauce and set it aside.
In a large sauce pan or a wok, place 2 tablespoons of oil. Add the scallion, garlic, grated ginger, bell pepper strips, and cilantro. Stir fry for a few minutes to wilt the herbs. Then add tofu, Brussels sprouts, squash, and potato chunks and stir fry gently for several minutes.
Reheat the sauce, over a low heat and take out the lemongrass pieces and discard them. Pour the sauce over the stir-fried ingredients. Cook the mixture over a low heat while stirring for 2 minutes. Add the fresh lemon or lime juice in. Top the dish with cilantro and serve it hot with rice and/or roti (bread).
Shanta Nimbark Sacharoff is a resident of the Sunset District of San Francisco. Shanta is a co-founder of Other Avenues Food Cooperative, where she worked for over three decades. Currently retired from that job, Shanta now writes recipes and articles on food and nutrition. She demonstrates vegetarian recipes and teaches cooking classes in SF.
She is currently doing backyard cooking videos with her daughter Serena to share her recipes with the community. Shanta is the author of the cookbooks Cooking Together and Flavors of India and a local food co-op history book, Other Avenues Are Possible: Legacy of the Peoples Food System of the San Francisco Bay Area. Shanta’s cookbooks are available in San Francisco at Other Avenues Food Cooperative, Rainbow Grocery Cooperative, Green Apple Books, Folio Books, Omnivore Books, Book Passage, and in Sausalito at Driver’s Market. You can also order her books through books.google.com, greenapplebooks.com, or instacart.com/rainbow-grocery.
(1) How to Prepare Packaged Papadams (also called Papads)
Papadams, crispy, chip-like crackers, are a popular snack in India. Papadams (also known as papadas) are made from black lentil flour, oil and spices. The very stiff, papadam dough is rolled into paper-thin discs, dried and packed to sell. Most households in India do not make papadams from scratch but buy them packaged from grocery stores as making papadams is time-consuming process and done by skilled people, in factories. In fact, one of the oldest papadam factory, Lijjat Papad, is a cooperative that was started by a few Mumbai women with a shoe- string budget in the ‘50s and now employs thousands of women who share their profits. They make millions of papadams daily to sell in India and to export them abroad.
Packaged Papadams are sold in the US at ethnic food markets and in some health food stores, along with other wheat-free products. However, unlike a bag of potato chips, packs of papadams are not ready to eat. They have to be roasted or fried before you eat them. Here are 3 methods of preparing the papadams.
After you purchase the package of papadam from a store, do not refrigerate, instead stock them in a pantry. Before serving, cook them using one of the three following methods.
Roasting on a skillet: Open the package and place one papadam at a time on a heavy skillet (such as an iron pan) that has been preheated at a high temperature, very hot. The papadams will begin to form blisters. Press the papadam with a kitchen cloth all over its surface so that it cooks evenly forming blisters all over and changing color. Turn the papadam a few times and cook until it is crisp. Repeat the process to cook more papadam and stack the cooked papadam on a platter or a basket.
Roasting in a Microwave Oven: Like cooking popcorn, a microwave does this job quickly and effectively. Cut each papadam into two pieces. Adjust the oven temperature to popcorn setting. Place one or two pieces in the microwave and cook for 30 seconds. Flip over and cook on the second side for 20-30 seconds. Store cooked papadams on a plate or in a basket.
Deep Frying: Although this technique is not preferable by some, deep frying is is a practical method when serving papadams at a later time after preparing. To deep fry: heat a cup of oil (or less for just a couple of papadams) in a wok or a small frying pan. Slide a papadam into the oil. Turn the papadam using a tong as soon as it comes to the surface. Cook on the other side for a minute until light brown. Remove it from the oil, allowing excess fat to drain back into the pot. Serve the papadam hot or at room temperature with a chutney. (Cranberry chutney recipe to follow.)
Cranberry Chutney
Chutneys are a spicy condiment and they are an essential element in an Indian menu. Chutneys are served, in a small portion, with a meal or with a snack. At many Indian restaurants, chutneys are often served with papadams, before the rest of the meal arrives.
Freshly made chutneys are not to be confused with the preserved pickles that take many steps to make. Pickles are usually put away for weeks or even months before serving. In contrast, fresh chutneys are made quickly with fruits, vegetables, nuts or seeds. Ingredients for chutney are often mixed raw, but some chutneys are made by cooking the ingredients, as in this cranberry chutney.
I had never seen cranberries before coming to the US from India. When I was served cranberry relish at a Thanksgiving dinner, I was enchanted by its color and aroma. I decided to spice it up to make the chutney.
Ingredients:
2½ cups cranberries
1 cup water
¾ – 1 cup sugar, honey, or maple syrup
1 tablespoon freshly grated ginger
½ teaspoon each ground cardamom and cinnamon
Few pinches of ground cloves
Few pinches of cayenne powder (or to taste)
First, chop the cranberries coarsely using a food processor or a blender. If you are using a blender, add the cup of water to the berries when you blend them (which you will be adding to cook them with). The water helps facilitate blade movement in the blender. For the food processor you don’t need to add water when chopping the berries. You can also use a wide-bladed knife, but the electric gadgets make the task easier.
Next, transfer the chopped cranberries to a saucepan. Add water and cook the berries covered at a moderate heat for ten minutes to soften them.
Then, add the sweetener, ginger and powdered spices. Stir to mix and cook without a cover for 15 to 20 minutes. Check every few minutes and stir the berries to make sure that they do not stick at the bottom. When done, the chutney turns into a jam-like consistency and it looks shiny and deep purple in color. Allow the chutney to cool for a few minutes, but while it is still warm, pour it into clean glass jars. Close the jars tightly. The chutney is ready to be served hot or cold. This chutney keeps for up to two months, if refrigerated. This chutney makes an attractive and healthy holiday gift!
Chutney Recipe modified from Cooking Together; a Vegetarian Co-op Cookbook by Shanta Nimbark Sacharoff
Shanta is a writer and creates recipes. Shanta makes chutneys for the holiday months of November and December to sell at Other Avenues. You can find them refrigerated near the beer and wine section.
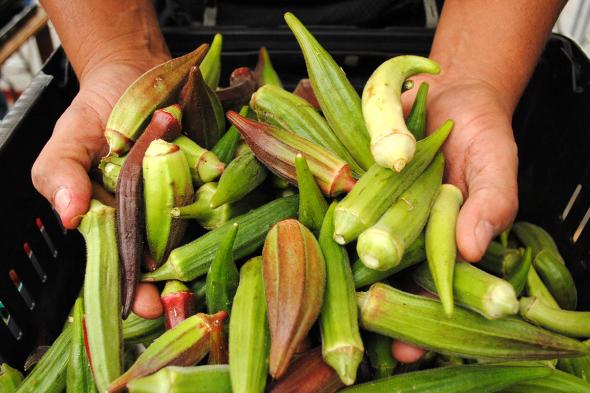
Okra is native to West Africa and was brought to the United States by enslaved Africans. It became a popular soul food in the south. However, the use of okra is not widespread in rest of the US.
Okra is believed to have come to India via the Middle East. In this tropical country okra thrived and became a popular feature in many Indian recipes with regional variations.
Okra is colorful, dainty, nutritious, and tasty when cooked right. Okra’s nutritional profile is very impressive. One cup of cooked okra contains 3 grams of protein, 147 mgs calcium and 1.18 mgs iron. These essential nutrients are often difficult to find in vegetables.
When cooked, okra has mucilaginous characteristics that works for or against a dish depending on the recipe. For example, in a gumbo recipe, okra’s sliminess is essential to create a thick sauce. However, in many Indian recipes, the stickiness is not desirable. So, there are a number of techniques in Indian cuisine to remove the sliminess of okra such as by deep frying in a batter, or by stuffing them with spices and flour or dry fruits, or by stir- frying as in suki bhaji (dry/cooked vegetables) as shown here.
When selecting okra, choose young, tender and firm green pods. For this recipe, okras should not be washed, but instead pat-cleaned with a wet kitchen towel.
30 pods of okra, cleaned with a damp cloth, tips removed and cut into four pieces, length wise
3 tablespoons vegetable oil
½ teaspoon black or brown mustard seeds
3 green onions (scallions) cut into half, lengthwise, including some green parts
1 semi-hot fresh pepper such as the Anaheim or Poblano pepper, cut into thin slices
l tomato, cut into small pieces
½ teaspoon each turmeric, coriander powder, cumin powder and salt
Few pinches of cayenne, optional
Juice of ½ lime or lemon
Few sprigs of chopped cilantro leaves
Heat oil over moderate heat and add the mustard seeds. Allow them to pop for a minute and then add the onion and pepper slices. Stir fry for a few minutes and then add the tomato. Keep stirring until tomatoes form lumps. Add the okra slices. Add the salt and the powder spices and continue to stir fry so that the okra is completely cooked using the juices of the vegetables. Sprinkle the lime or lemon juice all over the top. Correct seasoning adding the optional cayenne and more salt if needed. Garnish with cilantro and serve with rice or bread.
Shanta is a co-founder of Other Avenues Food Cooperative, where she worked for over three decades. Currently retired from that job, Shanta writes recipes and articles on food and nutrition. She demonstrates vegetarian recipes and teaches cooking classes in S.F.
Sambhar: South Indian daal (lentil soup) with vegetables
by Shanta Nimbark Sacharoff
The word dal (also spelled daal or dahl) means a soup-like preparation of split peas, beans, or lentils, which are staples in Indian cuisine. The consistency of a daal can vary according to its intended use. A thinner daal may be served as a first course, and a thicker version, such as this sambhar, may be served as an entrée. My sambhar recipe has a California touch – with lots of seasonal vegetables. In short, this soup is substantial enough to be a meal in itself!!
In addition to the use of pungent spices, a step in the preparation of dal that sets it apart from other soups is called vaghar (loosely translated as “tempering”). It is vaghar that gives the daal its characteristically deep and unique flavor.
8 cups water
1 cup red lentils, rinsed and drained thoroughly
1 teaspoon salt
1 fresh hot green chili pepper, such as jalapeño, minced after core and seeds are removed
1 tablespoon fresh ginger root, grated
½ teaspoon each coriander and turmeric powder
1 tablespoon safflower, canola, or olive oil
¼ cup onion, finely chopped
¼ cup bell pepper (any colors), chopped finely
1 cup cauliflower or broccoli, florets only, cut small
1 cup each: carrot, eggplant, celery, zucchini, and tomatoes, cut into ¼-inch chunks
1 tablespoon shredded dried coconut
3 tablespoons of freshly squeezed lime or lemon juice
1 tablespoon honey or sugar
A few tablespoons of fresh cilantro, chopped
For the vaghar:
1 tablespoon cooking oil
1 teaspoon black or brown mustard seeds
½ teaspoon cumin seeds
2 – 3 whole dried red, hot chilies
a pinch of hing (asafetida), available at Indian markets or health food stores (optional)
Rinse red lentils thoroughly in hot water and drain them completely. In a large soup pot, bring the water to a boil and add the drained lentils. Simmer lentils briskly uncovered for 15 minutes. Add salt, green chili, ginger, coriander and turmeric. Cover and simmer for 20 minutes more over a moderate heat.
While the lentils are cooking, heat 1 tablespoon of oil in a frying pan and sauté the onions and bell peppers for a few minutes. Add the chopped and cubed vegetables and stir fry them for five minutes. Next, add the shredded coconut and sautee for 3 minutes. Add this vegetable mixture to the pot of simmering dal. Add the lime or lemon juice and honey or sugar. Turn down the heat. Cover and cook the sambhar over a low heat for 15 minutes.
For the last flavoring step, make the vaghar: Heat the oil in a small saucepan or a metal measuring cup. Add the mustard seeds. When they start to pop, add the cumin seeds and dry red chilies. Then, moving quickly, add the optional hing, and pour all of this smoky oil mixture into sambhar, and immediately cover the pot. Turn off the heat, and keep the pot covered for five minutes or longer to settle the vaghar flavor. Next, uncover, remove the whole dry red chiles and discard them. Correct the seasoning Top sambhar with chopped cilantro and serve with rice or bread.
Recipe modified from Shanta’s cookbook, “Cooking Together: A Vegetarian Co-op Cookbook” which we sell at Other Avenues. Recipe Copyright2017@Shanta Nimbark Sacharoff
Tired of having to face alcohol-laden holidays? Want to serve something festive, but without booze?
These healthy drinks are great choices for those who want to have a cheerful and clear-headed drinks. They are also suitable for young kids who cannot have caffeinated drinks such as chai or coffee.
Recipes by Shanta Nimbark Sacharoff
Hibiscus Cocktail (Jamaica)
¼ cup dried hibiscus flower (also known as hibiscus “tea”)
2 cups water
2cups cold, clear apple juice
Ice cubes as needed
Boil water and hibiscus for several minutes. Strain the brew, cool it at room temperature and refrigerate to chill. Add apple juice. Add more apple juice for a sweeter drink. Pour into four glasses (with ice, optional) and serve.
Hibiscus Punch
¼ cup dried hibiscus flowers
1 cup water
2 cups clear apple juice
1 cup or bit more seltzer water
About a dozen very thin slices of apples and lemons or oranges (with their skin, but core and seeds removed)
Make the brew using the instruction above. Chill and mix with the apple juice. Right before serving, add seltzer water. Taste for sweetness and add more juice if needed. Transfer to a bowl with fruit slices and serve.
Welcome Drink: Cucumber Thirst Quencher
This is my version of a beverage that was offered to me as a welcome drink at an Indian hotel on a very hot day.
2 large organic cucumbers, cut into sticks lengthwise (important to use organic as you will need to use the skin)
4 to 6 sweet apple (such as golden or red delicious) cut into small chunks or 2 – 3 cups of clear apple juice
½ inch long fresh ginger root
A few fresh spearmint leaves
1 lime
Rinse cucumbers and cut off its ends. If you have a juicer, juice the cucumber, apple, ginger and a few mint leaves. Squeeze the lime juice and serve with mint leaves on top. If you do not have a juicer, use a blender to blend cucumber with a cup of water, ginger and a few mint leaves into a puree. Strain the puree using a fine sieve or a cheese cloth. Next, sweeten with apple juice. Squeeze in the lime and serve with mint leaves on top.
Refrigerator Pickles with Cucumbers and other Vegetables
By Shanta Nimbark Sacharoff (author of Cooking Together)
Pickling vegetables, fruits and other food items has been an old tradition throughout the human history, as our ancestors must have figured out how to preserve abundant food for the time of scarcity. Stories of pickling have been documented in many folklores.
Preserving foods in vinegar or other acidic solutions is one of the oldest methods of preventing food spoilage. Archaeologists believe that ancient Mesopotamians pickled food in 2400 B.C and that people of Tigris Valley in India pickled cucumbers in 2030 B.C.
Pickled vegetables haves many health benefits such as reducing muscle cramps and maintaining blood sugar level. In addition, pickles are a good source of antioxidants. Pickled foods are easy to digest and pickles aid the process of digesting in general.
Pickling vegetables for the fridge is very easy. Unlike pickling processes for long-term preservation, here the pickles are meant to be consumed within two months. And this recipe requires very little preparation. You can combine many vegetables to make your jar colorful and turn it into an elegant, edible gift. No picnic basket should be filled without a jar of pickles!
The ingredients needed for the recipe are easy to find at Other Avenues, except for the grape leaves. Fresh or preserved grape leaves can be found in ethnic specialty food markets. Although not essential for pickling, grape leaves are added to the jar of pickles to keep them crisp — a better option than alum, another additive used for keeping them crisp.
Ingredients:
4 to 6 pickling cucumbers (2 or 3 if long)
2 medium size carrots
1 (or a ½ ) daikon radish or a bunch of breakfast radish or 1 watermelon daikon*
2 cups white vinegar**
3 cups water (purified water preferred)
2 tablespoons (or less) kosher salt (or any sea salt)
2 teaspoons sugar (or less)
5 to 6 smashed cloves of garlic, skin removed
Several sprigs of fresh dill weed
Few fresh or bottled grape leaves
Few small pieces or slices of jalapeno pepper after removing seeds
*Any fresh and crisp vegetables can be used for pickling.
**Adjust the amount of vinegar and salt to suit your taste.
Method:
First rinse all vegetables, but do not peel. Then, cut them into thin strips. You can slice some vegetables such as watermelon daikon into thin rounds. Rinse the dill weed and grape leaves and pat dry them with towels. Prepare the garlic as described in the list. Set the prepared vegetables and the herbs aside
Next, combine the vinegar and salt in a saucepan and bring to a complete boil. Transfer this solution into a mixing bowl and add the cold water and sugar. Whisk the solution to dissolve the salt and sugar. Set the solution aside.
Clean two wide mouth quart- size mason jars with tight-fitting lids. Line the bottom of the jars with some garlic chunks, two pieces of a grape leaf, some dill weed sprigs and two pieces of jalapeno pepper. Next, arrange the strips and pieces of vegetables into the jars making sure that the strips stand next to each other, well-packed but leaving some room for the liquid solution. Arrange grape leaves on the wall of the jar, reserving two pieces to be added on top. Add remaining garlic, dill weed and jalapeño pepper into both jars.
Next, slowly pour half the liquid solution on one jar of the vegetables and the rest of the solution on the other jar. Arrange remaining grape leaves on top. Close the jars tightly and leave the pickles at room temperature for an hour. Then, gently turn the jars upside down to distribute the liquid and place the jars in the refrigerator. The pickles will be ready to be consumed in 36 hours. Make sure to place the jars back in the refrigerator after each serving. These pickles can keep for up to two months.***
Enjoy!
*** When you have finished all the pickles from the jars, the brine can be used to make a second batch. These will have a milder, less tart and salty flavor which some people may prefer. Discard the liquid after the second batch of pickles. You will need to start a new liquid solution for the following batch(es).